| Overview
The site explorer in the internal portal is a place where all the information requirements related to a particular site, can be queried and viewed using tags.
Site Explorer is a tool that assists development and help verify the product, It helps to understand the building level data created when a CCU is installed. It allows to filter based on tags/devices, and explore the site data points and also help in advanced troubleshooting. It allows easy point ID query and also allows ease of use of viewing all the tags that have been created by the CCU at a point of time that shows the current system state.
It comprises of two important components:
- The Entities which is a logical breakdown of the building or a site,
- Tags that make the entities, which are used to store and view the information in the software system of 75F®(Internal, Facilisight and Apps)
Using a Site Explorer the user can:
- View all the Id's that is associated with the Haystack hierarchy of data for a particular building along with their tags
- Verify that all related points are created accurately for the equips inside a Building once deployment is done.
- Check current value of many points at a glance and also their historical recorded data, for one hour.
| Accessing and Using Site Explorer
To access and use the site explorer.
- Log into the Internal Portal
- Click Site Explorer.

The site explorer screen is displayed.

- Type to search for a site or select a site from the drop-down sites to retrieve information related to a particular site.
The site explorer screen is displayed with the information for the selected site.

The following table explains the various fields displayed on the page:
| Field | Description |
| Sites | You can use this option to select a particular site for which you could view the details |
| Filter Nodes |
You can use this option search for and select a floor, room or a device, to filter the points for a particular floor, room or a device as below.
Based on the selection made as shown above the results in the number of points are reduced as show below.
|
| Tag/Query |
You can use this option to toggle between, search and select the tags from the list, or type the tag names as a query to filter out the results as below.
Tags:
Query:
Note: The search |
| Select Tags |
You can use this option to add tags and filter the results based on the combination of the tags added.
Note: The results are filtered to 9 after using the combination of tags zone, current & temperature |
| Reset |
You can use this option to remove all the filter criterion used.
Note: The filter criterion are removed once the reset option is clicked.
|
| Information |
You can hover over this option to get a glimpse of what actions can be carried out in the screen.
|
| View Historized data, Current Value & Priority Array |
You can select this check box to view the historical recorded data, the current value data, priority array the is applicable for the entities as below.
|
| Items per page |
You can use this option to view more results per page.
Note: You can view up to a 1000 rows or results per page. |
| Next and Previous list |
You can use this option to navigate to the next and the previous screens, when only 100 rows per page is displayed.
|
| Download |
You can use this option to download the results in a .xls format for your reference. Note: Using the download option after filtering using tags or nodes will download only the applicable result rows. |
| Accessing Results Displayed
The result section is in a tabular format, with number of rows and columns.

The following table explains the various fields displayed on the page:
| Field | Description |
| Entity /ID | You can view the entity description and the entity ID, which can be used in the Query Assist tool to extract the JSON related to the entity( a format in which the data is stored for the particular entity. |
| Display Name | You can view the name displayed for the entity in the software system in widgets or visualizations. |
| Tags | You can view the list of tags that make an entity |
| Current Value | You can view the current/ Historical value under this section, when the View Historical data & Current Value check box is selected. |
| Unit | You can view the unit applicable for the entity value under this section. |
| Ref | You can view the parent reference the entity would be referencing in the site in the system. |
| Filtering Using Tags
Tags are the metadata for any entity, they form the base for the data stored in 75F® system (Internal, Facilisight and Apps). Every entity has a unique set of tags to identify it uniquely, If more than one entity has the same set of tags, it is probably referencing a different parent in the system.
The site explorer provides the user with an auto search option while searching tags as shown below, reducing the hassle for the user trying to remember the right tag with the right kind of spelling.
Note: When tried searching for the tags starting with "t" the tool provides a list of tag starting with "t" to select from.

When searched using tags it not only filters the results for the tag, it also highlights the tags used in the filter in the tags list for an entity as below.

|Viewing Historized Data
From the points list for a particular site.

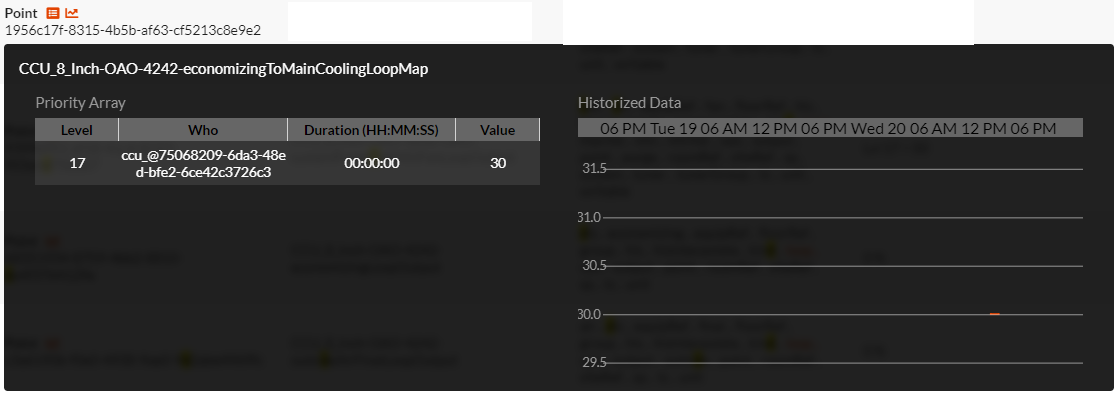
A historized icon  alone for a point indicates, the presence of only historized values.
- Hover over the historized
 icon to visualize the data as below.

- Click the historized
 icon to visualize the data as below.

A historized icon along with a priority array icon 
 for a point indicates, the presence of both historized values and a tuner value involved.
- Hover over the Historized data or Priority array

 icons to visualize the historized data for the point as below

|Accessing and Editing the Priority Array Data.
From the points list for a particular site.

- Click the Historized data or Priority Array

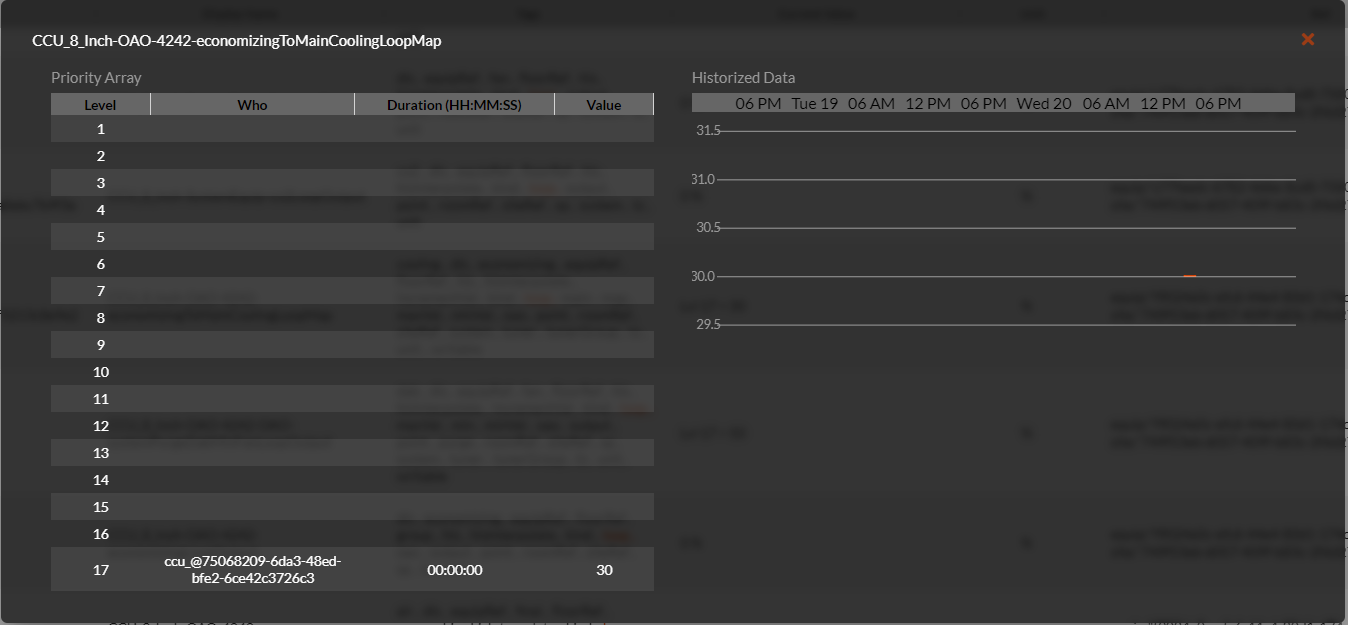
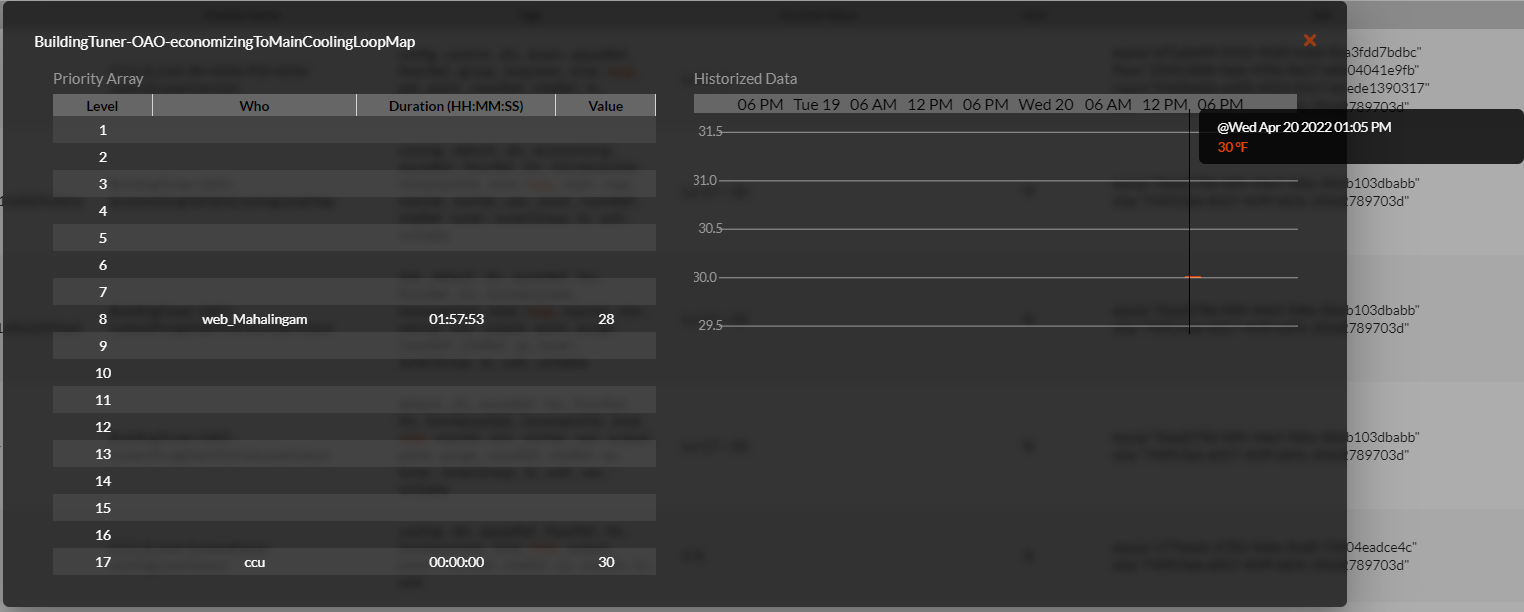
 icons to visualize the historized dat, and the priority array information for the point as below.

- Hover over the historized data to get further details.

- Click the edit icon next to the priority array level to modify the information.

The Priority array data editing window is displayed.

- Edit the necessary values like the cooling loop map in this case, and the time period for which you need the effect to be present, in this case 20 mins.

- Click Update to confirm the changes.
The change is updated in the site explorer priority array table.

The change made take effect in the site explorer and the same is cascaded to the Portals and the CCU as shown below.
Portal:

CCU:

Note: Unlike the tuner changes made from the tuner section of the portals and CCU, that is when a tuner is changed at a building level, the same get cascaded to the system, zone and module levels, the tuner change made from the site explorer only effect the point for which the tuner was changed and does not cascade anywhere.
The Historized data values post the change made can be visualized in the site explorer for the point as below.


 icon is to be clicked after entering to query string to filter results.


Comments
0 comments
Please sign in to leave a comment.